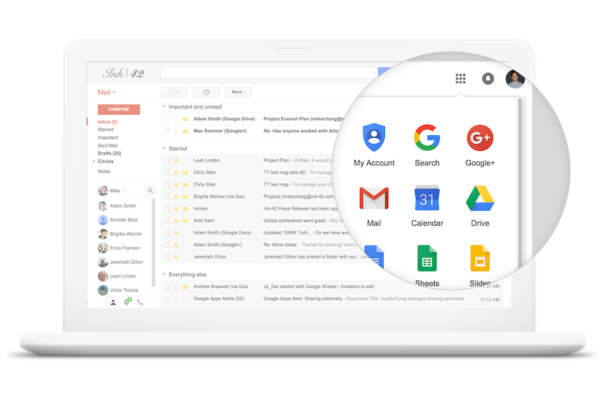
For many businesses, G Suite provides a lot of basic needs in a familiar and intuitive way. This cloud-based package of productivity apps is budget-friendly for small to mid-size businesses, and many people are already using Google apps in their personal lives already. So, signing up for G Suite is a no brainer, and now that you have, what’s next?
Understanding the needs of your company and the types of admin tasks you’ll face is important to know if you want to start using G Suite like a pro from the get-go. That means remembering you can add users in bulk (instead of one by one), knowing how to reset passwords while enforcing specific password requirements, and understanding what you need to do before deleting a user’s account from your organization.
At Electric, we know there is a long checklist of things to do when you’re running a business. In fact, that’s the reason why we recommend using G Suite. But if you don’t fully know the things you can actually do with G Suite, then we’re not doing our job. So here is a list of common systems administration tasks you’ll probably face at least once.
Adding a user
When you create an account for a new hire or user, they get their own business email and access to G Suite services. This can be done per hire, but if you hire in groups or are in the process of transitioning over to G Suite, you can also add multiple users at one time. This will save you time from submitting payment for each user individually.
How to add a user individually to G Suite:
Step 1: Login as an Admin
Step 2: When you arrive at the Admin console homepage, go to Users
Step 3: Choose the organizational unit you want to add the user to
Step 4: Click the ‘+’ button and then Add new user
Step 5 (optional): Add a photo of the user
Step 6: Add account information i.e. name, primary email, etc.
Step 7: Create a password by automatically generating one or creating your own password that is at least eight characters long. Be sure to tell the user to change their password when they sign in.
Step 8: Click Add new user
Step 9: Send the new user their initial password via email, Slack, or any messenger tool you use internally
Note: It can take up to 24 hours for the user to appear.
How to add multiple users at the same time in G Suite:
Step 1: Login as a super admin
Step 2: Download Google’s template file and enter your users’ information accordingly
Step 3: Save the file
Step 4: Upload the file
Updating a user profile
When someone moves to a different location, changes their phone number, or moves up in your organization, you can go in and update their profile information. You can also add things like secondary email addresses, employee IDs and titles, and department information.
How to update a user’s profile in G Suite:
Step 1: Login as an Admin
Step 2: When you arrive at the Admin console homepage, go to Users
Step 3: In the Users list, select the user whose profile you are updating
Step 4: Select User information
Step 5: Click any of the following sections to update/edit the user’s information
Step 6: Be sure to Save by clicking the button at the bottom right
Resetting passwords
If someone forgets the password to their G Suite account, you can reset their password in the G Suite admin console. Note: only Super Admins can help other Admins reset their password.
How to reset a user’s password in G Suite:
Step 1: Login as an Admin (or Super Admin to update an Admin’s password)
Step 2: When you arrive at the Admin console homepage, go to Users
Step 3: In the Users list, select the user whose password you are resetting
Step 4: Once you find the user, click Reset password on the right
Step 5: Select Password > Reset Password
Step 6: Create a password by automatically generating one or creating your own password that is at least eight characters long. Be sure to tell the user to change their password when they sign in.
Step 7: Choose either Done or email the password to the user
Deleting a user
If your business utilizes Team Drives to share resources and store files, then you probably don’t have to worry as much about losing data when removing a user from your organization. If you aren’t using Team Drives, or if your leaving employee has any important data under their G Suite account, make sure to transfer ownership of their files before removing their account. Deleting someone’s G Suite account revokes their access to all G Suite services and removes them from any groups or channels they were in.
How to delete a user in G Suite:
Step 1: Before you delete any user, come up with a standard process/plan of action for how ownership will be transferred. Making sure to transfer things like file ownership and re-routing a user’s emails is an important step in ensuring that the deletion of a user doesn’t have a detrimental impact on your business. Check out our guide to offboarding an employee here.
Step 2: Login as an Admin
Step 3: When you arrive at the Admin console homepage, go to Users
Step 4: In the Users list, select the user whose profile you are deleting
Step 5: Click the symbol of more (three dots in a vertical line) > Delete
Step 6: Check the boxes to confirm that you understand the implications of deleting a user
Step 7: Select Delete User
Note: You can restore a delete account up to 20 days after deleting a user.
Creating a group
With Groups, you can better organize communication and collaboration within your company. You can create mailing lists, web forums, and collaborative inboxes. As a G Suite admin, you can assign other users and admins to manage groups, too. This means you can make Groups by department, regions, or offices and assign the right people as Admins to manage their teams.
How to create a group in G Suite:
Step 1: Login as an Admin
Step 2: When you arrive at the Admin console homepage, go to Groups
Step 3: Click the ‘+’ button
Step 4: Enter the group’s details e.g. name, email address, description, etc.
Step 5: Add users to your groups
Step 6: Select Create
How to create a group in Groups for Business:
Step 1: Head to this url: groups.google.com/a/your-domain.com
Step 2: Sign in as an Admin
Step 3: Follow user instructions
Step 4: Add users to your groups
Adding and removing users from a group
When adding new members to a group, you can invite them, directly add group members, or approve requests from others who want to join a group. You also have the ability to remove single users or multiple users from a group. On the Groups page, you can oversee and manage all members in a group.
How to add users to a group in G Suite:
Step 1: Login as an Admin
Step 2: When you arrive at the Admin console homepage, go to Users
Step 3: In the Users list, select the user who you need to add
Step 4: Click the name of the user to open their account
Step 5: Select Groups
Step 6: Click the ‘+’ button
Step 7: Search for the group you want to add the user to by name
Step 8: When you finish selecting the group(s), select Add
How to remove users from a group on G Suite:
Step 1: Login as an Admin
Step 2: When you arrive at the Admin console homepage, go to Groups
Step 3: Click the name of the group you are looking to remove a user from
Step 4: Select the Members section
Step 5: Find the member you want to remove and select Remove
Step 6: Choose Remove Member to confirm
Enhancing security
The G Suite admin console allows you to deploy 2-step verification and enforce password requirements. This gives you some control over protecting your users’ Google accounts, as well as ensures your employees are meeting compliance.
There are a lot of things you can do to organize and oversee your business operations through G Suite, and Electric is here to show you how—we can also complete any of these tasks automatically, all you have to do is send a Slack our way with your request. If you don’t have a dedicated IT staff, or if your IT staff is overloaded with more pressing tasks, we can also be your Systems Administration. Don’t get bogged down by the little details – that’s what we’re here for.


